Forgive me for the ridiculously long, epic post.
 |
| This. This is why I stamp. |
So, you already dove into the wonderful world of nail polish with endless options for colors, finishes, special effects, etc etc. You've already spent half of your tax return on nail supplies. Maybe you still have some Christmas money burning a hole in your pocket. Maybe some Swagbucks to spend? (sorry, I don't SB but I know some that do and all I can say is that you ladies are DEDICATED!)
Let's face it. If you aren't any good at free-hand (I have already expressed I am no artist and struggle with free-hand nail art), or you are in a nail art rut and vinyls just aren't doing it for you, you may have glanced at some nail stamping. I know you've seen it out there. Hell, you wouldn't be here on this post on my blog if you weren't interested! Most of my nail art is created with stamping.
I'll tell you one thing, I love nail stamping. Love it. It's my savior when all else fails me and I don't want to sport a plain mani. But it wasn't always sunshine and rainbows in my stamping world.
 |
| Unicorns, Sunshine, and Rainbows. That's the stamping world. (image courtesy of Google images) |
 |
| Yep... this is more my style (image courtesy of Google images) |
I've definitely come a long way using one simple strategy. Practice. That's it. Trial and error. Fails and wins. It takes effort, it takes patience, and it takes celebration when you succeed.
 |
| And to celebrate with friends is even better!! (gif courtesy of Google images) |
So, the purpose of this post is to offer you some guidance when you are ready to throw your stamper in frustration and donate all of your plates to Goodwill, because they obviously need them more than you do.
 |
| (gif courtesy of Buzzfeed and Google images) |
DON'T DO IT! Stick with it, keep practicing, and find out what works for you. Here are some things you should consider when you want to get into the world of stamping:
- Can you dedicate the time to stamping?
- Stamping is a commitment. It is a rare occasion that I can have a stamped mani complete in under an hour. That's start to finish, starting with my base coat, but still, it's not always a quick fix unless you are stamping over an old base. In that case, sure, less time.
- How much are you willing to spend on supplies?
- In my experience, I've found that the cheaper the plate, the more frustration you will experience. If you spend the money on good plates, you will usually experience good results. Same applies to stampers and polish.
- Are your nails curvy or flat?
- The stamper you purchase will depend on this fact. You can't make your nails curvy or flat. It's just how they grow. But you can get stampers that work best for you depending on how curvy or flat your free edge is. Easy way to tell: Look at your nails straight on. If you see a more pronounced "C," they are curvy. If not, they are flat. I'll go more into depth on how this applies to your stampers later.
 |
| I know this is a backwards "C" but CURVY ;-) |
 |
| My pile of MoYou London plates |
Let's talk about supplies. There are so many different stamping plate manufacturers out there these days. Too many for me to list. Instead I will link my favorites, the ones I have experience with, and my most challenging plates.
Favorites:
- Cici&Sisi
- MoYou London
- Bundle Monster
- AliExpress
- XIUYA 01
- XIUYA 02
- XIUYA 07
- XIUYA 11
- XIUYA 15
- Pueen
(edit 9/15)
My most challenging plates are my Bundle Monster sets. I want to throw them every time I use them. Which is rarely ever, because I don't have the patience for them. They were my first set to own, and I am so disappointed that I spent money on those terribly etched, worthless plates. I urge you to do a little research (especially if you are a stamping beginner!!) and look for reviews. They do count for something. I'd advise you to spend a little more and get the better plates because it is worth your money AND your time!
 |
| My various stampers and scrapers |
Next up is stampers. There are a variety of stampers, and they range from firm rubber to squishy and sticky silicone. As I mentioned above, you will want to select a type of stamper based on if your nails are curvy or flat. The firmer stampers will work best with flat nails, and the squishier stampers will work best with curved nails. Various stampers also work differently with plates too. For example, my squishy firm stampers work better than other stampers on my Cici&Sisi plates.
My first purchase was a Konad firm rubber double ended stamper. This stamper does not work well with my super curvy nails. Cue the stamping frustration. However, this is the best type of stamper to work with my shallowly etched Bundle Monster plates. Since it's firm, it doesn't distort the image when I press down hard to pick up the stamp. But it doesn't work well with my beautifully etched MoYou London plates. I much prefer my marshmallow rectangular stamper from MoYou London. It is super squishy and only requires a light touch to pick up images. I use my squishy firm Cici&Sisi stampers to pick up Cici&Sisi images. I have two since I purchased the first two stamping sets and they were included.
Here are some links and products I have experience with:
I am currently considering the Creative Shop Stamper for purchase. (edit 9/15 -- my awesome friend gifted the wonderful Creative Shop stamper to me and it is everything I'd hoped it would be!!) I've heard wonderful things about it and the extra large surface for stamping is perfect for my huge lumberjack nails. (shout out to my friend Megs for that!) Also, I've seen my friend Carmie use hers and I drool every time.
 |
Creative Shop Stamper - my current lemming! Lemming officially squashed! |
Another point to touch on is scrapers. If you have any metal edged scrapers, toss 'em. Throw them in the garbage. They are no good to you or your plates, unless you want scratches across your images. Instead use a plastic card. The less bendy the better. I received an awesome mini scraper from MoYou London when I ordered my stampers from them, but you don't need to buy a special scraper. Got an old credit card? There you go, you're ready to scrape!
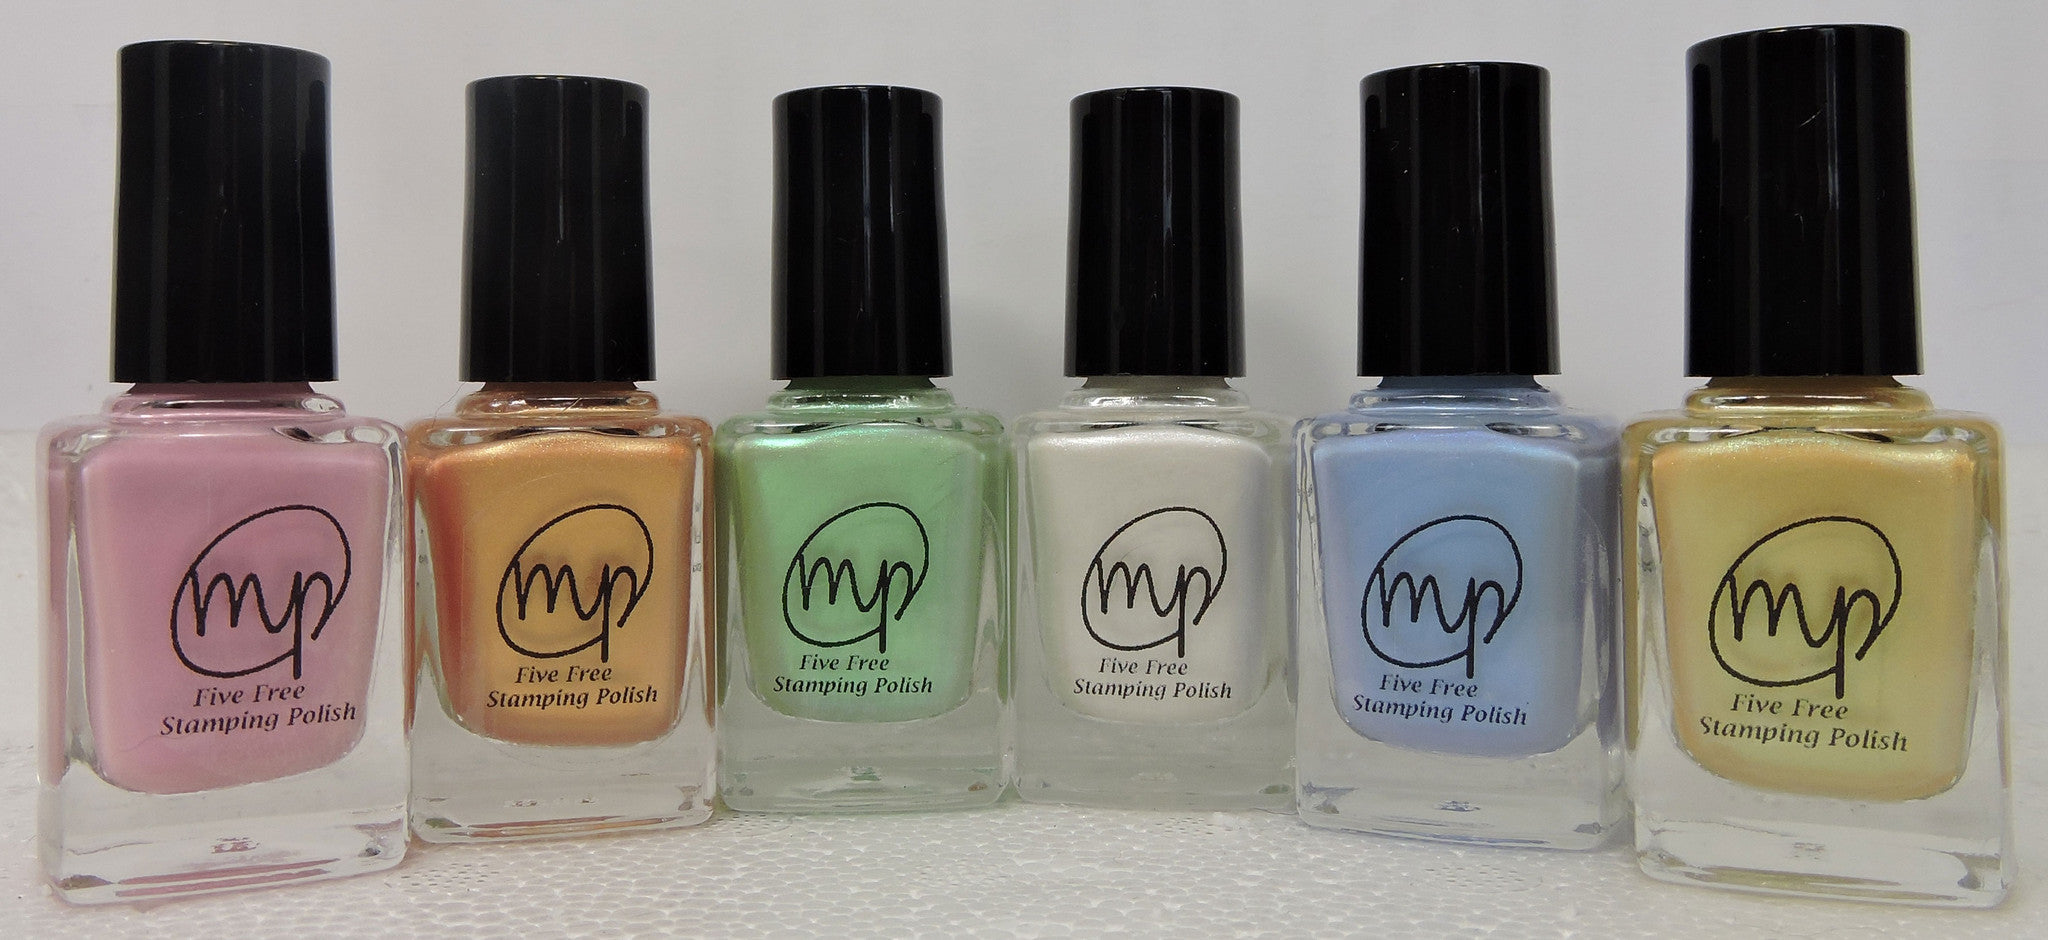 |
| MPolish Spring 2015 Collection |
Finally, let's discuss polish. There are stamping polishes out there made specifically for, you guessed it, nail stamping! Until now, I haven't really paid much mind to them because there are so many regular polishes you can use for stamping (see all of my previous stamped nail posts!). But I've found a game changer. I am not sure if you've heard of Konad stamping polish, or Rica polishes, or Mundo de Uñas, but I'm not really sure what's in them, nor will some of them release ingredient listings. Seriously scary. But, now there is an awesome 5-free stamping polish line that was just released: MPolish by Megan! You can find swatches of a few Spring collection MPolishes in my past posts (here, here and here), but I warn you... they are amazing and you will want them all. A 5-free stamping polish that stamps over black?!? Sign me up! They just launched yesterday and have already sold out, but have no fear! You can place a pre-sale order for the full Spring collection on her website at www.mpolishes.com.
Since I've had a chance to use MPolish before they released, I have a few tips and tricks for you.
- Be aware that this line is made for stamping over dark polishes. They may show up over lighter polishes, but they really shine over dark.
- These polishes are translucent when working with them. It is hard to see some of them on a white stamper head, so it's best to use a darker stamper head. You can still see the image on a white stamper head, but it's a little hard to tell if you have picked up a full image or if you have bare spots.
- You don't need to use a lot of polish; a little goes a long way! Don't cover your image with the polish. Instead, dab a line across the top and scrape across your image to fill it.
- The Spring line of Mpolish tends to dry a little quicker than other polishes. Remember you are working with a thin layer of polish when stamping, so speed is your friend here. Work a little quicker than usual with them.
- Deeper etched plates make MPolish a bit more user friendly. Images with thinner lines can still pick up beautifully, but the deeper the etching, the easier this polish will be to work with.
- Scraping direction makes a difference. Sometimes you need to try scraping a few different directions before you find what works with your plate. Scrape diagonally, scrape vertically, scrape horizontally, maybe backwards... Trial and error. But always try to scrape straight across and not dig into your image. You may need to scrape twice to avoid picking up extra polish on your stamper.
- When using a squishy stamper, a light touch is helpful when picking up your image after scraping. It is also in your best interest to roll your stamper a bit when picking it up. Make sure not to twist your stamper or your image will be ruined. Roll in one quick motion when you pick up the image and don't press down too hard.
- Line up your image with your nail and stamp! I've found it's easier to hold my stamper and lay my nail into the image rather than having my hand flat and placing the image on my nail. I have better control of where the image ends up when I press my finger into the stamper (when using a squishy stamper). If using a firm stamper, you may need to roll it a bit over your nail to transfer the full image.
- Wait a minute or two and then topcoat! I haven't had any smearing issues with MPolish, but I use KBShimmer Clearly On Top quick dry topcoat and I always float it on my nail. I can't speak for any other topcoat.
- DON'T GIVE UP! Practice working with different polishes. Some MPolish colors are a little easier to use than others, but the color payoff and end result are well worth it.
If you have any questions I may not have touched on in this post, feel free to email me at dancerspolishedlife@gmail.com! I'll gladly offer any suggestions and answer any questions I am able to. I hope you found this post helpful! If you want to check out some other talented ladies that stamp well, here are a few blogs I suggest:
And just for shiggles, please enjoy highlights from the evolution of my stamping journey from then 'til now!
 |
My very first stamping experience! Almost exactly one year ago!
(BM plates = exactly what their initials stand for) |
 |
| Still using those BM plates... |
 |
| My first MoYou London plates! |
 |
My first leadlighting!
Probably still my favorite stamped mani, minus the mess on my index nail |
 |
| More leadlighting, 30 weeks ago! |
 |
| My first advanced stamping! This took forever! |


This is a wonderful, very thorough post! You, Carm, and Mega are the stamping queens!
ReplyDeleteThank you, Pish!! I really appreciate that!
DeleteSo much amazing info and I was cracking up the whole time reading it. I need to reconsider a lot of my color combos too...terrible. Fucking rainbows! Thanks for all the love!!
ReplyDeleteLol, RAINBOW ALL TEH MANIS!!!! :-p You are very welcome. Thanks for making a stellar stamping polish!
DeleteGreat post! The information on stampers is very helpful.
ReplyDeleteThank you, Boop! =)
DeleteAwesome post! I love the picture of all the stampers lined up, so squishy looking. I also enjoyed seeing the evolution of your stamping technique, as well as nail length. And last, thanks for the shout out!
ReplyDeleteThank you so much, Nadia! Isn't it funny looking back? And you are welcome, I love your blog!
DeleteAwesome post! Great job!! You make me want to blog!
ReplyDeleteThanks, Ana!! You should!
DeleteFantastic post tamara! I'd like to add this to my helpful links page on my blog, if you don't mind :)
ReplyDeleteThank you, Manna!! Of course you can add it, thank you for asking! =D
DeleteI love this post! I'm pretty new to stamping and I can see myself using tons of your tips!
ReplyDeleteThank you, Jenny! Happy to help! =)
DeleteWhat an amazing comprehensive post - this will be an incredible resource for so many people. I would recommend the latest BPS plates as a cheaper plate option, they're all great. I have mega problems with my BM set too. I think the most important thing to invest in is a good stamper - I love my MoYou Double Ended but started out with the Konad Double Ended (although firm) it picked up images very well and got me going. MoYou London is awesome... I need MORE.
ReplyDeleteNow - go share this everywhere!
Wow, thank you so much, Charlie!! I appreciate your response and enthusiasm! It's funny, I never thought I'd need more than one stamper when I was just starting out; it just didn't make sense to me. Now I get it, and I want to buy more too!
DeleteWhat a huge post, great work! I would like to warn for the Qgirl plates on Born Pretty Store, I had only bad experiences with them, but the regular BPS plates are a good budget alternative.
ReplyDeleteThank you! I appreciate the warning, I would hate to spend more money on sub-par products. I've seen BPS's new plates, they look fabulous!
DeleteA really great post! I have been super frustrates with stamping before and I'm so glad I persisted and kept going. Stamping is the ish! I find a squishy stamper works best for me because my nails are soft and bendy. My nails give way under a firm stamper and the full image doesn't transfer. I ordered an rectangular stamper from BPS which coincidentally arrived today and I'm a little disappointed because it is smaller and firmer than I thought. I haven't tried it yet. I hope it works!
ReplyDeleteThank you! I felt the same way after my first few stamping experiences with the BM plates. I am so happy that I stuck with it and spent some money on good plates and a great stamper! It made all the difference to me. I hope you like your new stamper once you start using it!
DeleteThank you, Naias!
ReplyDeleteUm, excuse me, I love you. That is all.
ReplyDeleteHahahaha, not as much as I love you!!! <3 <3 <3 ;-)
DeleteAmazing post! I've never stamped and didn't really understand everything that went into it until I read your post. Still not ready for it, but I feel like I have a better idea of what I'd be getting into! Also love the humor you added to this post!
ReplyDeleteThank you, Katey! It is a lot of work, but honestly, it's one of my quickest mani techniques sometimes. And it can snazz up a mani so beautifully. If you do get into it, honestly I'd say start with a Cici&Sisi jumbo set. And feel free to contact me if you ever have any questions! =)
DeleteWhat a fabulous post! You were so thorough, and thought of everything. I would love to get my hands on some of those MPolishes one of these days. Also, thank you for the foul-mouthed cat .gif. I needed that laugh.
ReplyDeleteThank you! And haha, I aim to please. ;-)
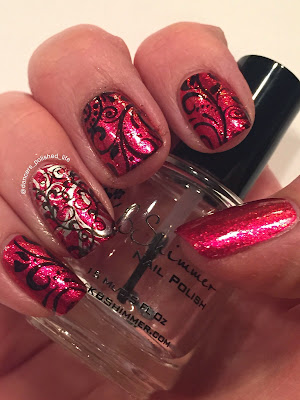
DeleteIn the very first mani of this post, what is the polish you used to stamp with on the ring and middle fingers?!
ReplyDeleteThat glowing blue? It's MPolish Starflower stamping polish. You can find my blog post about it earlier in my blog. It is truly amazing!
DeleteThis was a great overview! I'm going to try stamping for the first time this weekend. I have a Moyou rectangular stamper and I just got my Mpolish this afternoon. Thanks for all the tips!
ReplyDeleteThank you, and you are very welcome! I think you did a great job with your first stamping experience!
DeleteI love this post, it is so nice and detailed. You have covered all aspects of stamping. I am in love with stamping and learning lot of new techniques in stamping
ReplyDeleteThank you, Manisha! I adore stamping as well, and there is still so much out there for me to learn.
DeleteWow, very helpful post! It is fun to see your stamping evolution over time!
ReplyDeleteThank you, An! It's fun to look back and see how far I've come!
DeleteFor the longest all I had were BM plates and I thought I would never be anle to stamp and gave up. I bought a few other plates and like magic they stamped after years of frustration I feel like im playing catch up. So love this post. Lots of good tips. And that holo stamping? LOVE it!!
ReplyDeleteThank you, Savannah! I hear you on the frustration. Glad you found your way! ;-) I really liked how that holo stamping turned out, too. =)
DeleteWowza you got in depth there, but its awesome! This is a great post for beginners to reference!
ReplyDeleteThank you! I feel like I still hadn't even captured everything I could have. I just hit the basics for now. =)
DeleteGreat post! I definitely agree with you about the practice part!! Great stamping only comes with practice. :)
ReplyDeleteThank you! That was a hard fact for me to learn at first. Practice practice practice! =)
DeleteSuch a great post..you put so much effort. Stamping was impossible fr me, freehand always seemed d natural way..but now i guess it's only practice that v r pals now.
ReplyDeleteThank you, Setu!! =)
DeleteI just reread this post and it is so useful, especially for someone starting out!!
ReplyDelete